
Introduction
Developing an online portfolio is a key aspect to showcase professionalism. It provides a platform to expose your accomplishments, skills, and potential to prospective audiences. This blog post will guide you through the process of creating a personal portfolio website using GitHub, GitHub.dev, and the AI model, ChatGPT.
Step 1: Creating a GitHub Account
The initial step involves setting up a GitHub account.
- Visit the GitHub website.
- Click on Sign up, situated in the top-right corner of the web page.
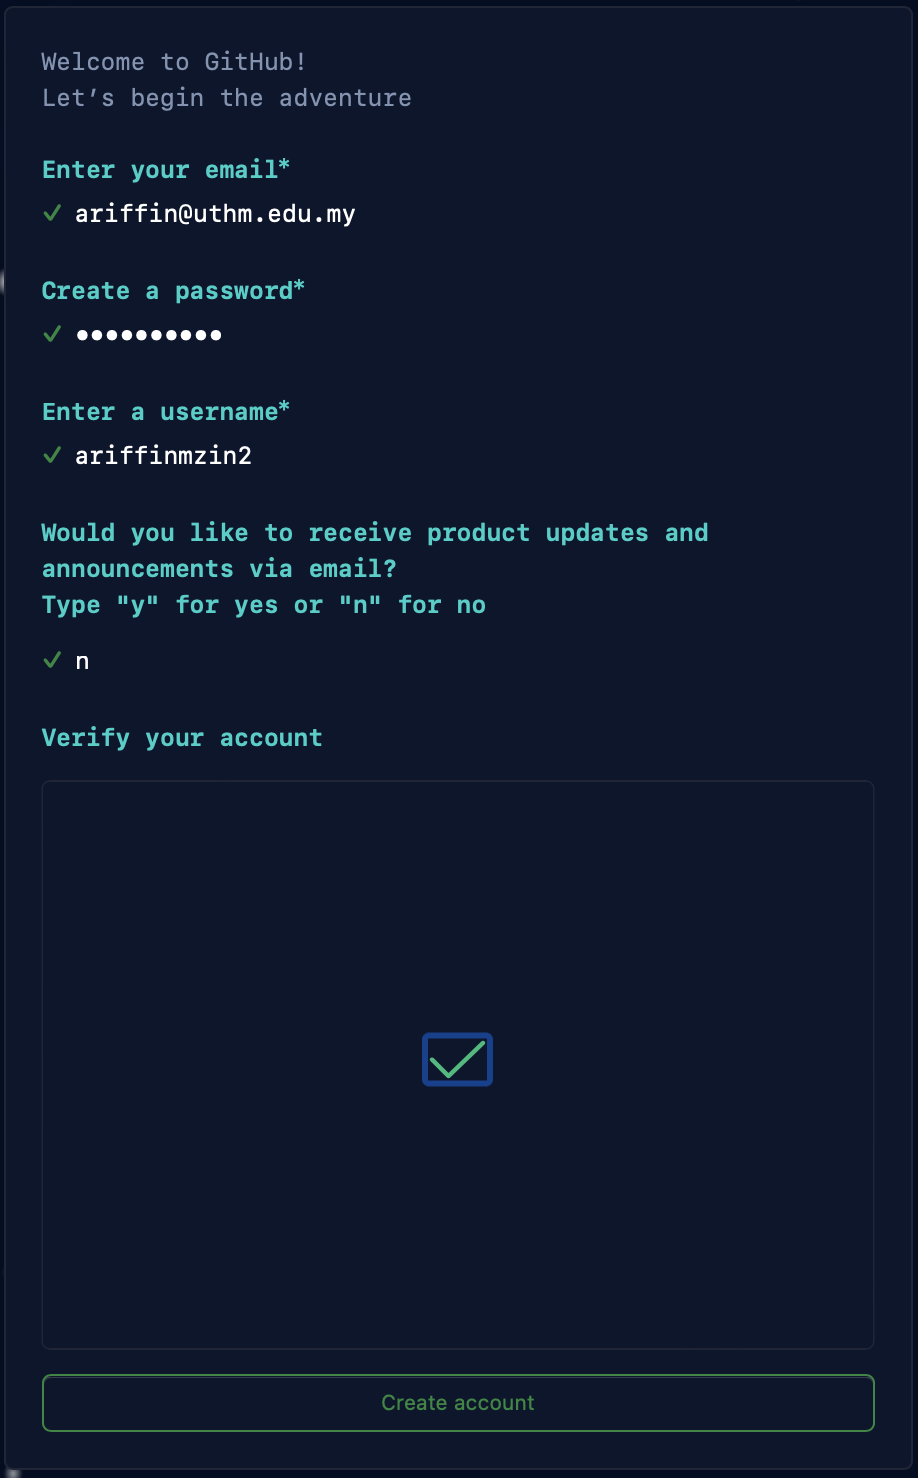
- Fill in the required fields: email address, your chosen password, and username.
Verify your account by clicking Start Puzzle and solving it. Then, select the Create Account button.
![GitHub1]()
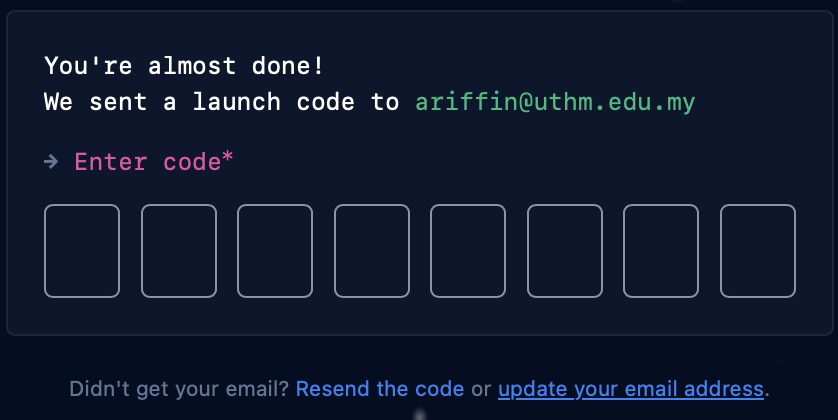
Check your email inbox for a launch code from GitHub. Type the code into the Enter code boxes and hit Enter.
![GitHub2]()
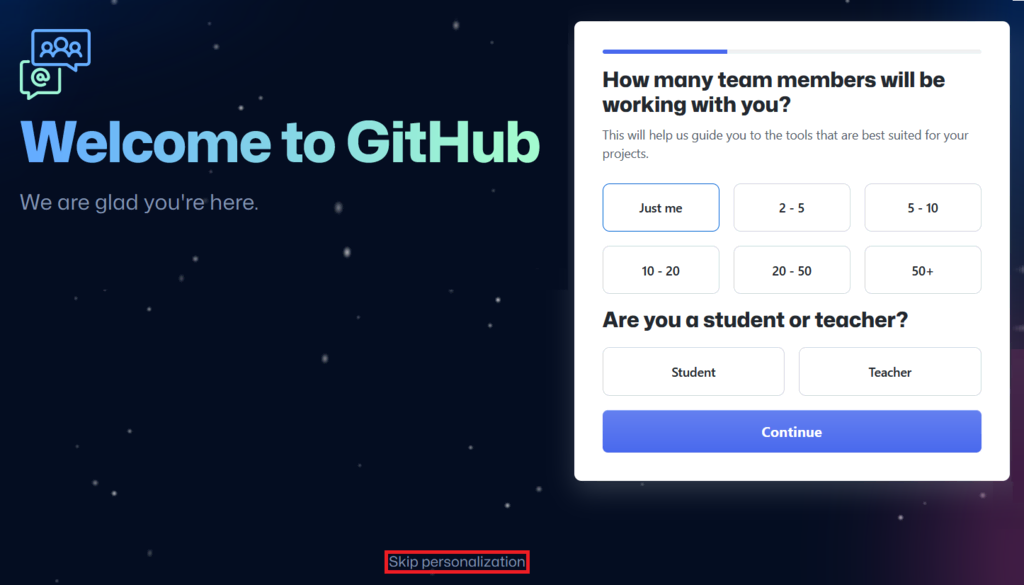
Answer some questions to automatically configure the GitHub account based on your preferences. Otherwise, click Skip personalization.
![GitHub3]()
Choose the Free Account.
- Wait until GitHub redirects you to your account page.
Step 2: Forming a New Repository
Upon successful creation of your GitHub account, the next step is to establish a repository for your portfolio.
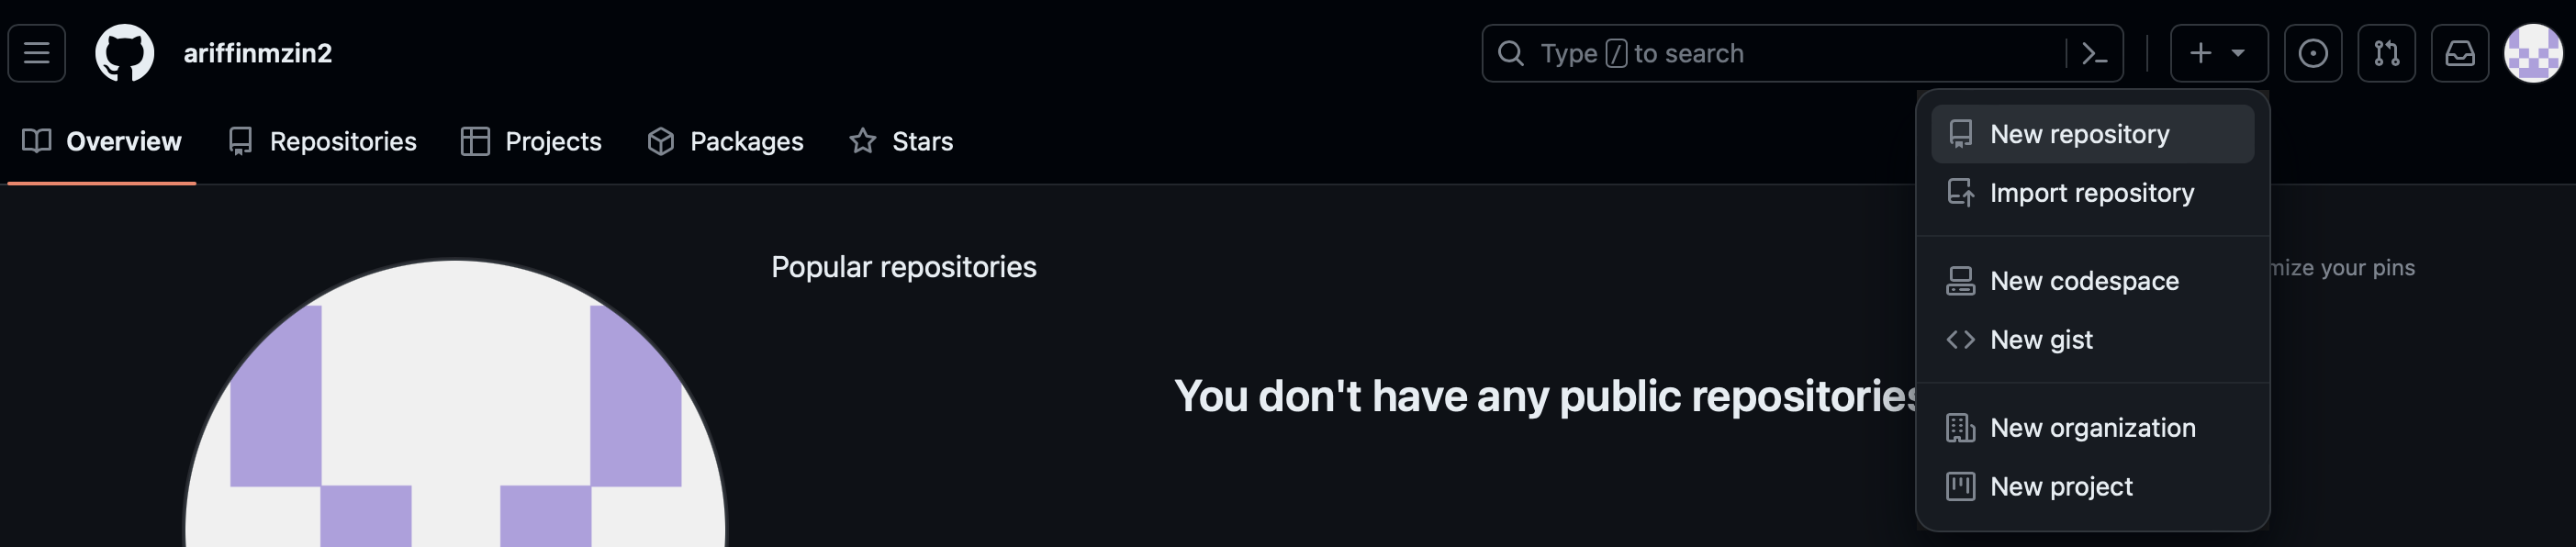
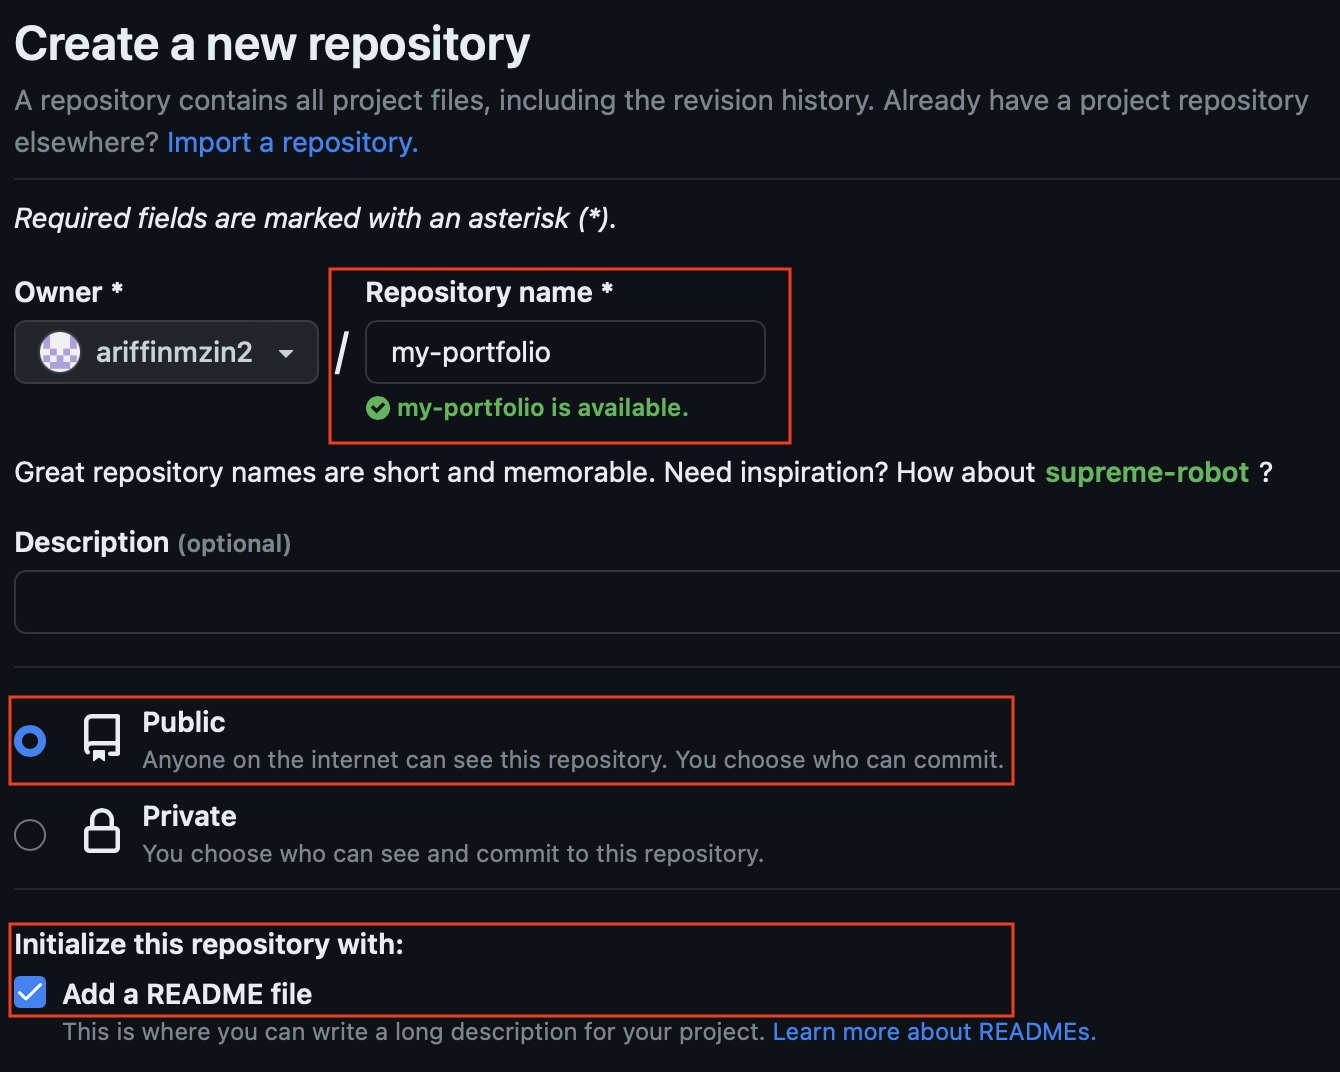
- On your dashboard, click the + button to initiate a new repository. From the drop-down menu, select New repository.
![GitHub4]()
- Name your repository appropriately, e.g.,
my-portfolio. - Ensure that the repository is set to
Public, and initialize it with aREADME file.![GitHub5]()
- Click on Create repository.
- Then GitHub will redirect to your repository.
Step 3: Creating an HTML File
Now, it’s time to create an HTML file that will lay the foundational structure for your portfolio website.
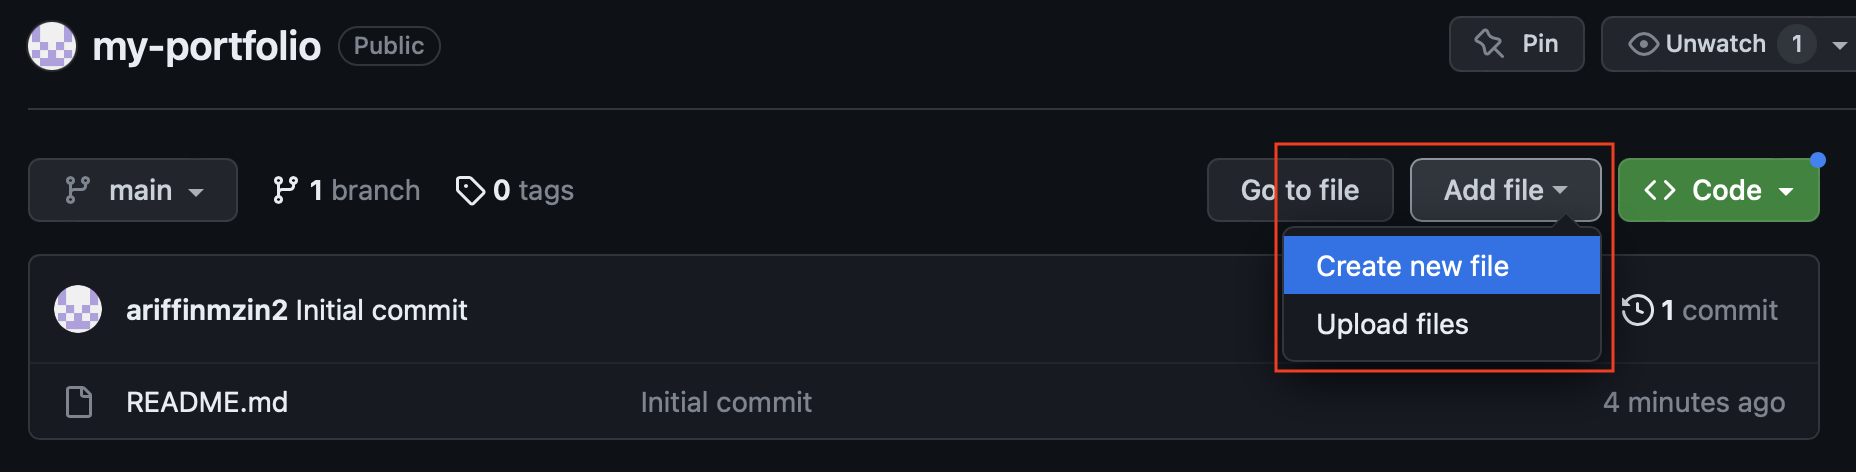
- On your repository and select Add file.
Choose Create new file.
![GitHub6]()
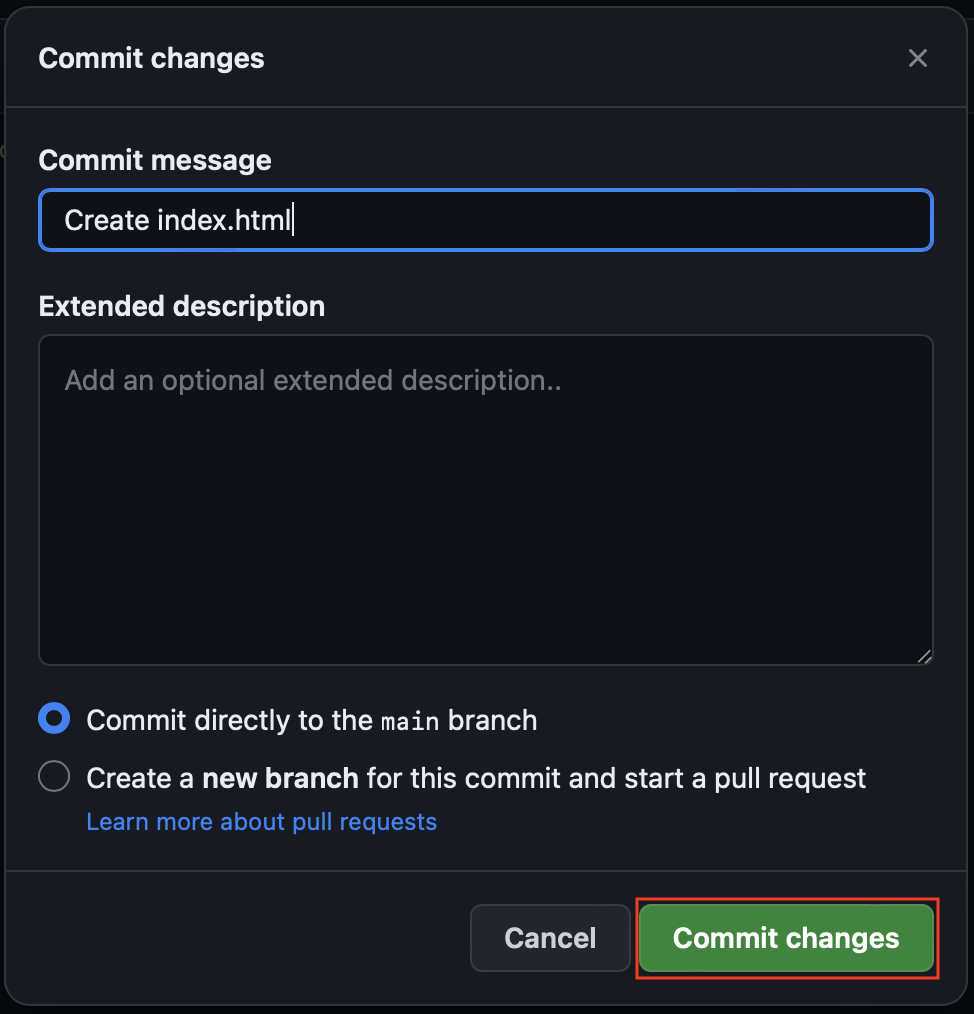
- Name your file as
index.html, and then click Commit changes button.![GitHub7]()
- A Commit changes prompt will appear, just leave as it is, then press Commit changes button.
![GitHub8]()

Step 4: Editing Using GitHub.dev
GitHub.dev functions as an intuitive code editor within GitHub. Here’s how to utilize it:
- On your repository and replace
github.comin the URL withgithub.devto launch the VS Code editor within your browser. Hit Enter.![GitHub9]()
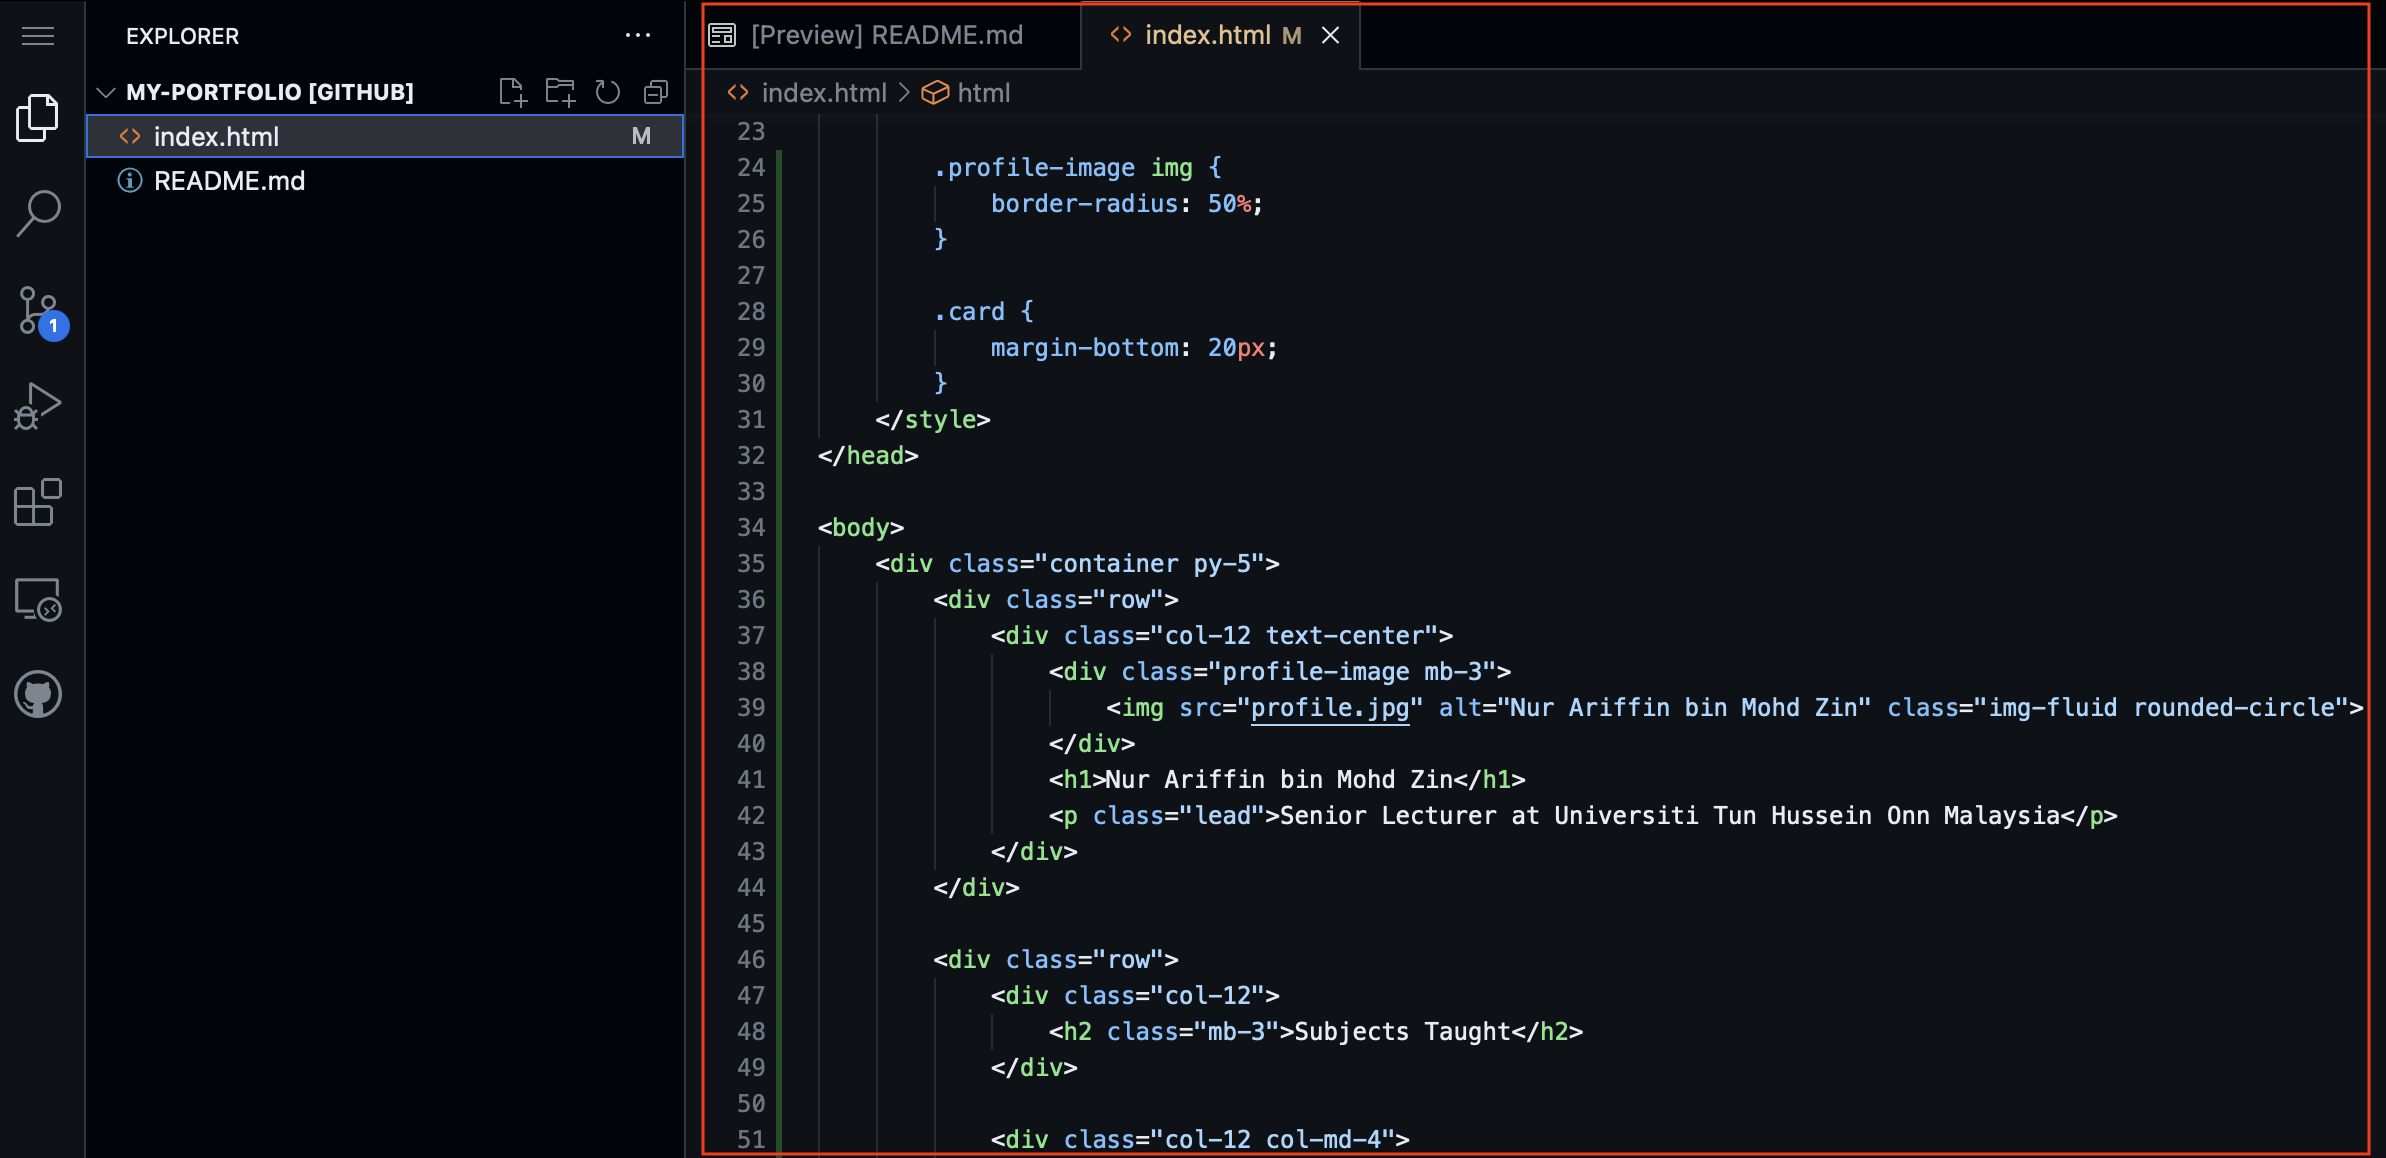
- Once in the editor, locate and open your
index.htmlfile.![GitHub10]()
- This is where you can input or adjust your HTML code. Be sure to save the changes once you’re finished.


Step 5: Leveraging ChatGPT for HTML Generation
ChatGPT can assist you in generating HTML structure for your website. Here’s a simplified prompt to generate a basic HTML layout which incorporates HTML, CSS, JavaScript, and Bootstrap:
Take on the persona of an experienced web developer.
Generate a portfolio website utilizing HTML, CSS media queries, JavaScript, and Bootstrap Cards. The CSS and JavaScript must be embedded inside the HTML file.
The website should be responsive across devices, look corporate and elegant. It will show my picture in a blue coloured header from a file named me.jpg with the size of 120px width and 150px height. The picture should be inside a circle. The website has grey coloured background underneath the Bootstrap card. It also has copyright letter inside the footer. The writing must be formal and straightforward, using center alignment and written inside Bootstrap Cards according to its category. The writing uses different font styling like bold, underline and italic. The website will include CDN logo for Facebook, LinkedIn, Twitter, Instagram and TikTok links using the below HTML code.
1
2
3
4
5
<a href="https://cdnlogo.com/logo/facebook-square-icon_429.html"><img src="https://www.cdnlogo.com/logos/f/74/facebook.svg"></a>
<a href="https://cdnlogo.com/logo/linkedin-icon_39423.html"><img src="https://www.cdnlogo.com/logos/l/66/linkedin-icon.svg"></a>
<a href="https://cdnlogo.com/logo/twitter_40255.html"><img src="https://www.cdnlogo.com/logos/t/45/twitter.svg"></a>
<a href="https://cdnlogo.com/logo/instagram_475.html"><img src="https://www.cdnlogo.com/logos/i/92/instagram.svg"></a>
<a href="https://cdnlogo.com/logo/tiktok_550.html"><img src="https://www.cdnlogo.com/logos/t/60/tiktok.svg"></a>
Each CDN logo must use the following CSS setting:
width: 30px
height: 30px
margin: 0 10px
Below are my LinkedIn, Facebook, and Twitter links that need to be associated with the CDN logo provided above. Use target=”_blank”
LinkedIn link: https://www.linkedin.com/in/ariffinmzin/
Facebook link: https://www.facebook.com/
Twitter link: https://twitter.com/
Instagram link: https://instagram.com/
TikTok link: https://tiktok.com/
The content of the website should be as follows. Locate inside individual Bootstrap Cards according to its category.
Name: Nur Ariffin bin Mohd Zin
Occupation: Senior Lecturer
Institution: Universiti Tun Hussein Onn Malaysia
Qualification: Degree in Computer Science
Subjects taught: Java Programming (2020), Web Development (2021), Blockchain (2022)
Skills: HTML, JavaScript, PHP, Python, Laravel, Node.js, React.js
My contact: [email protected],my
A new section ‘About me’ that display the summary of the above details.
Once you receive the output, ensure to edit and adjust the code to suit your requirements.
Step 6: Implementing Your Changes
After generating the necessary HTML structures:
- Return to the GitHub.dev editor.
- Copy and paste the code generated by ChatGPT into
index.html.![GitHub11]()
- At the navigation bar on the left, click the Source Control button.
![GitHub12]()
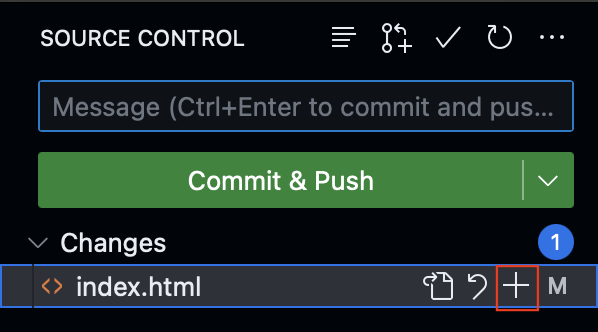
- Click the + button.
![GitHub13]()
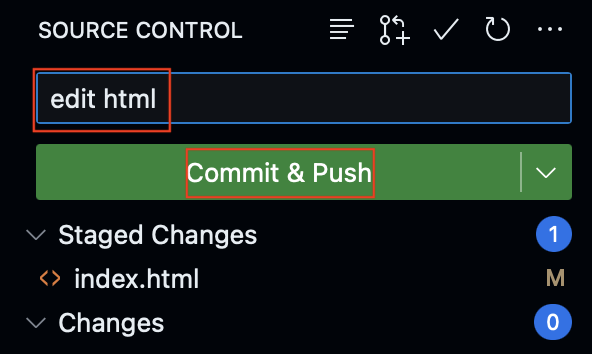
- In the Message text box, type
edit htmland press Commit & Push button.![GitHub14]()
- Now your
index.htmlfile has been saved. 😊

Step 7: Deploying Your Website
The final step is to publish your portfolio website.
- Navigate to your repository by replacing
github.devin the URL withgithub.com. Hit Enter.![GitHub15]()
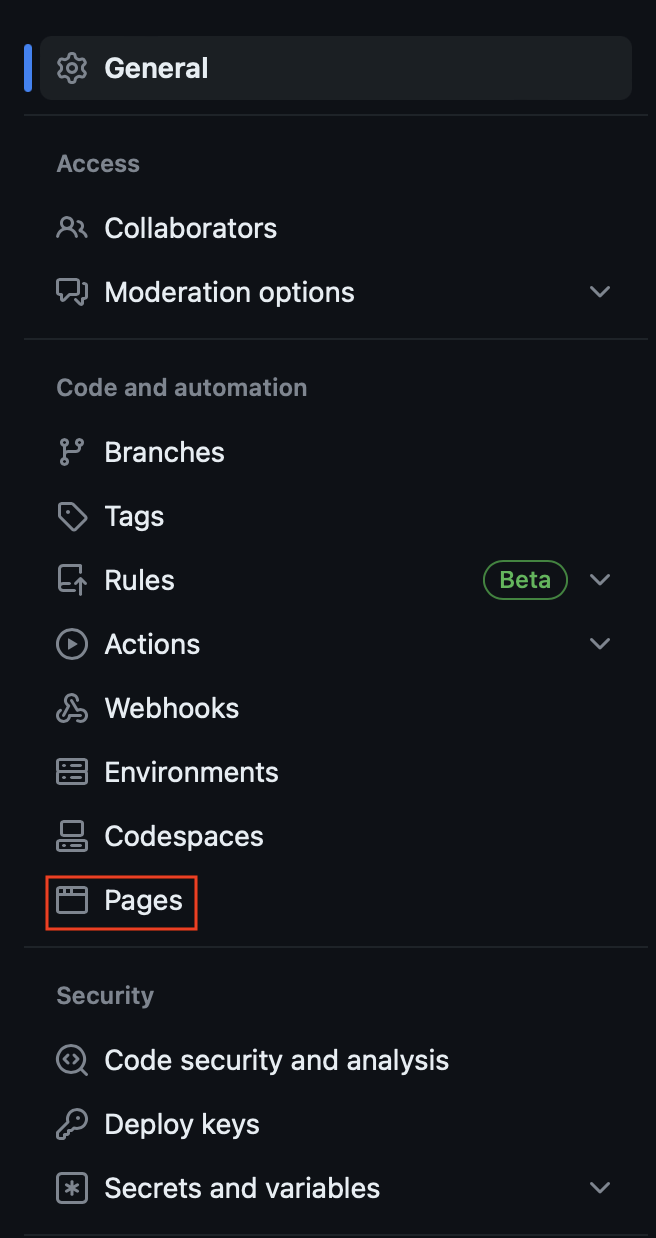
- At the top right corner, select Settings tab.
![GitHub16]()
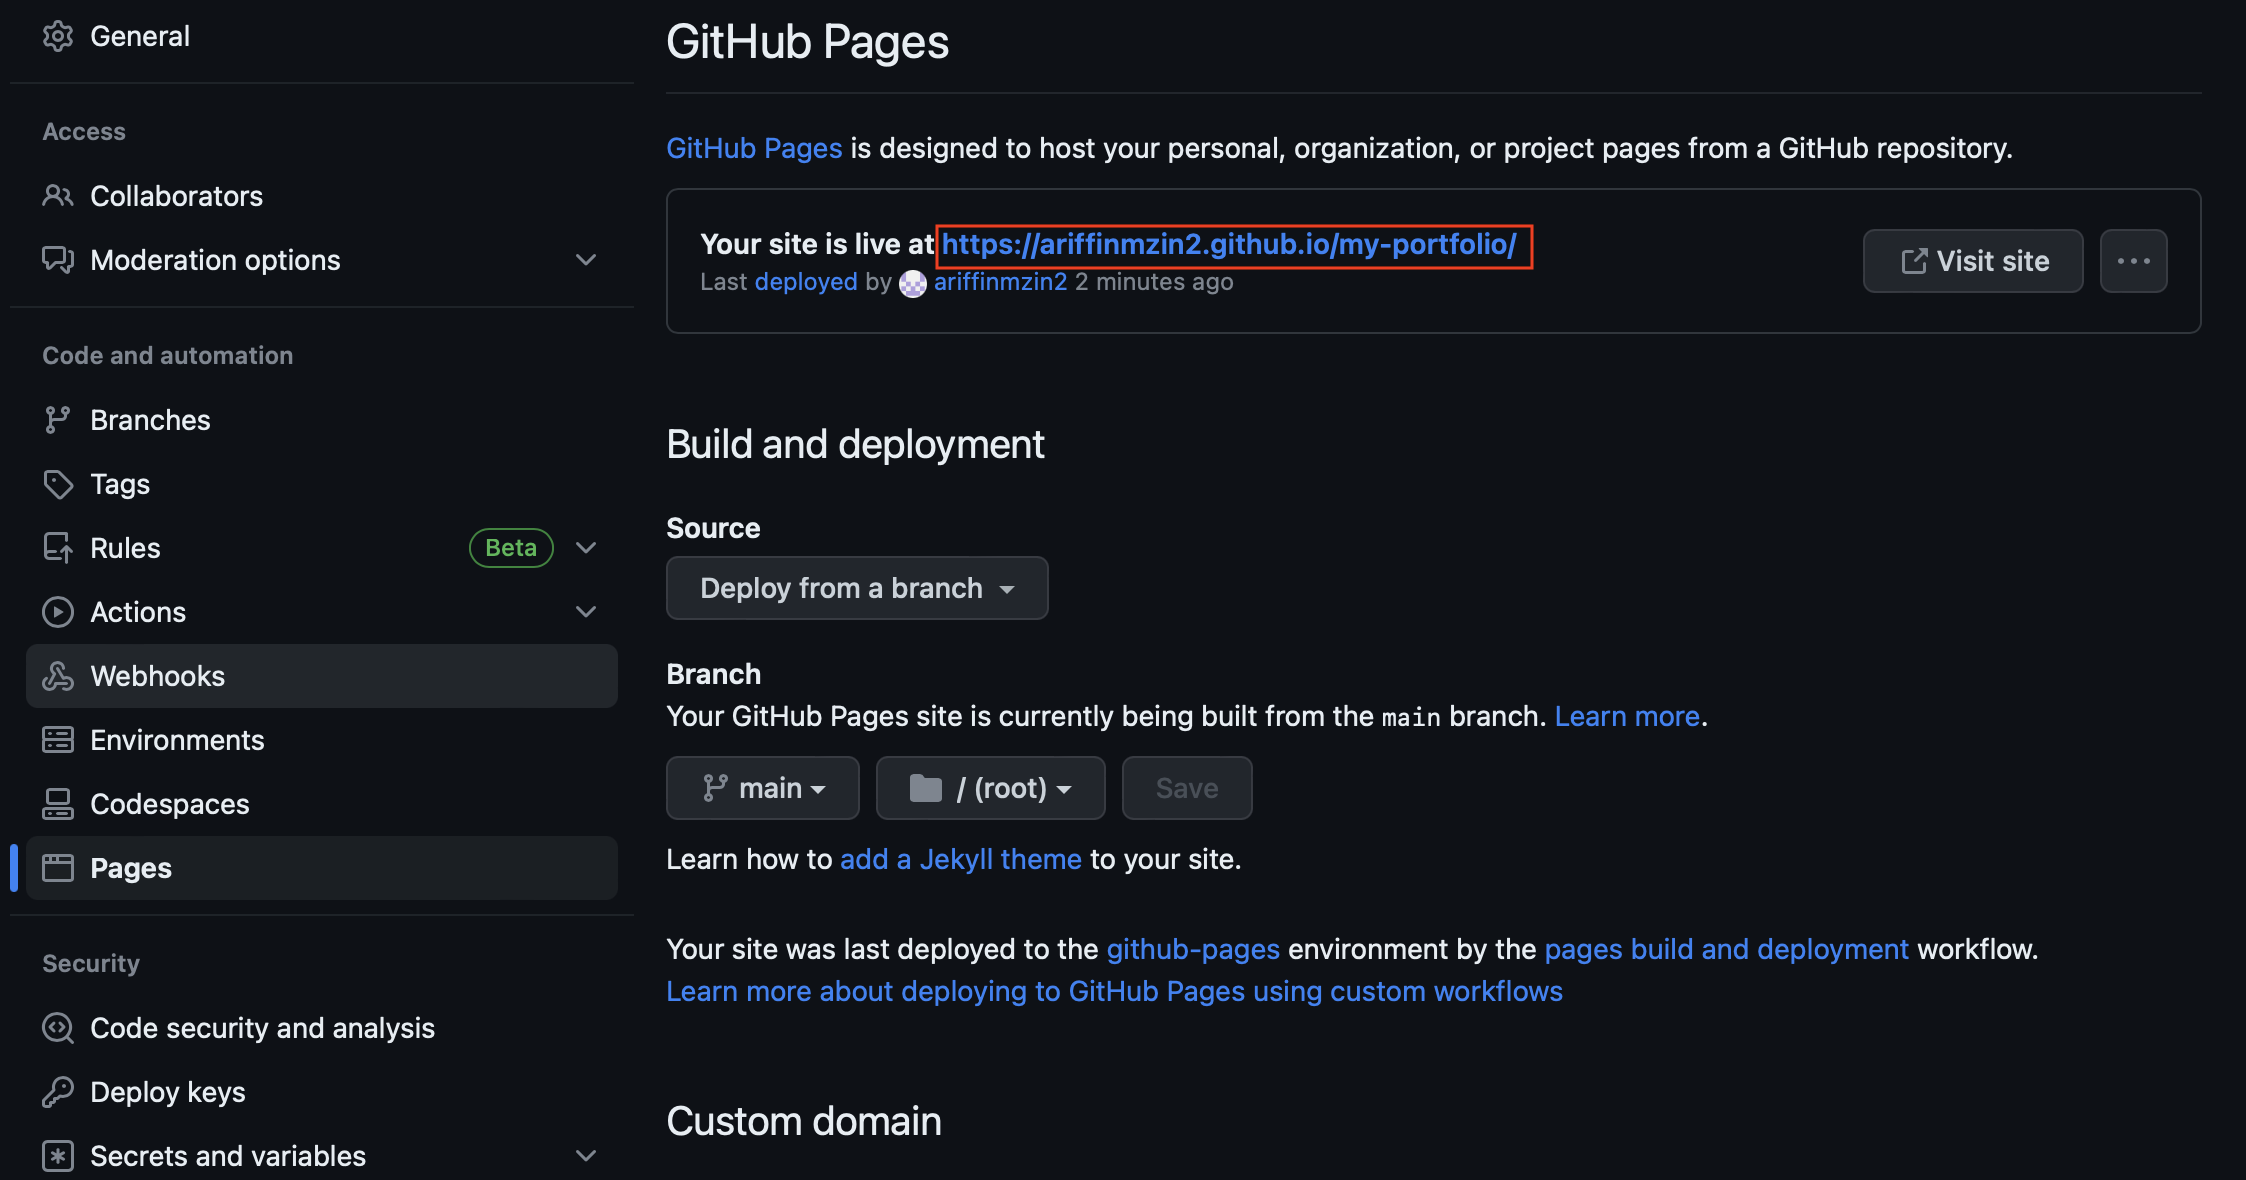
- On the left side, choose Pages section.
![GitHub17]()
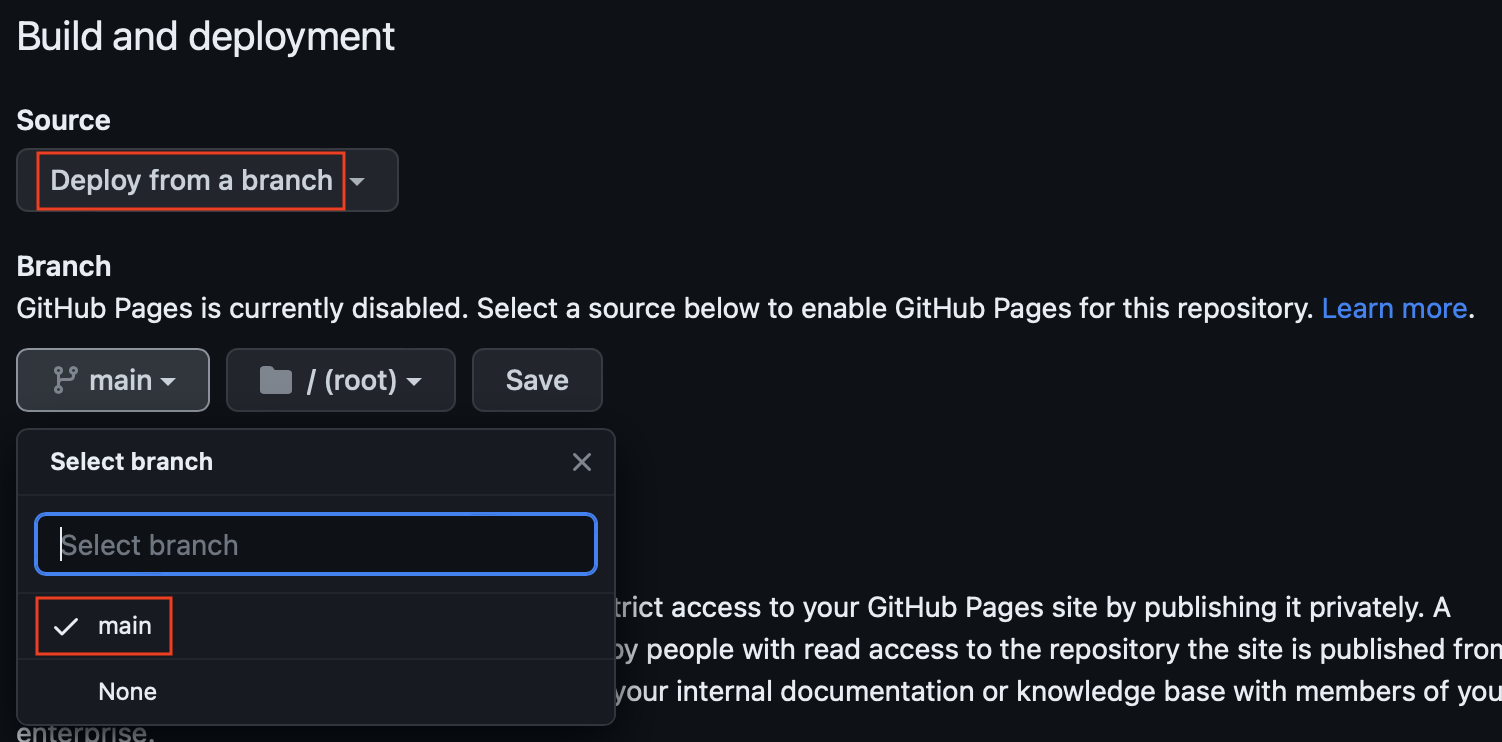
- Under Source, make sure the selection is
Deploy from a branch. - Under Branch, select
main.![GitHub18]()
- Click Save.
- Refresh the page after a while, you will see your website link. Click on the link.
![GitHub18]()


Now your website has been published and accessible to the public. 🎉 Remember, your portfolio is your personal brand, so invest time to ensure it represents your skills and experiences effectively. Happy building! 🚀